
We often rely on background processes for tasks that take longer to complete without the need for user interactions. It can be anything, really, from data loading or synchronization to complex business logic processing. While these processes run, it can be hard for users to monitor progress. Luckily with AMS, things got a whole lot easier!
I’ve created an example to show you how this can be achieved using AMS. By following along, you’ll also get more familiar with the different AMS components and functionalities. Our goal is to have a page where we can start background processes and monitor them in real time!
Database objects
First, we create a table to store process data, which will be used for our report.
create table ams_jobs (
    job_id number(20) generated always as identity(start with 1 increment by 1),
    job_name varchar2(100 char) not null,
    job_user varchar2(100 char) not null,
    job_duration number(3) not null,
    job_status varchar2(10 char)
);
alter table ams_jobs add constraint ams_jobs_pk primary key (job_id);We also need some code to execute as a background process. Therefore, I’ve created a package with a procedure start_job, which will be executed through the DBMS Scheduler. The procedure has 2 parameters:
- p_job_id: This is the id that we’ll use to identify each job.
- p_duration: Whenever a job is started, a duration (between 30 and 90 seconds) is being calculated automatically.
create or replace package "AMS_JOBS_PKG" as

    procedure start_job(p_job_id   in ams_jobs.job_id%type,
                        p_duration in ams_jobs.job_duration%type);

end "AMS_JOBS_PKG";
/
create or replace package body "AMS_JOBS_PKG" as
procedure set_job_status(p_job_id in ams_jobs.job_id%type,
p_status in ams_jobs.job_status%type) is
pragma autonomous_transaction;
begin
update ams_jobs
set job_status = p_status
where job_id = p_job_id;
commit;
end set_job_status;
procedure start_job(p_job_id in ams_jobs.job_id%type,
p_duration in ams_jobs.job_duration%type) is
l_status varchar2(15);
l_output clob;
begin
set_job_status(p_job_id => p_job_id,
p_status => 'RUNNING');
for i in 1 .. (p_duration / 5)
loop
sys.dbms_session.sleep(5);
ams_api_pkg.send(p_url => 'YOUR_AMS_REGION_URL ',
p_api_key => 'YOUR_API_KEY',
p_room_names => 'YOUR_ROOM_NAME',
p_message => '{"job_id": ' || p_job_id ||
', "pct": ' || round(((i * 5) / p_duration) * 100) ||
', "status": "' || case when i = (p_duration / 5) then 'COMPLETED' else 'RUNNING' end || '"}',
p_username => v('APP_USER'),
p_status => l_status,
p_output => l_output);
end loop;
set_job_status(p_job_id => p_job_id,
p_status => 'COMPLETED');
end;
end "AMS_JOBS_PKG";
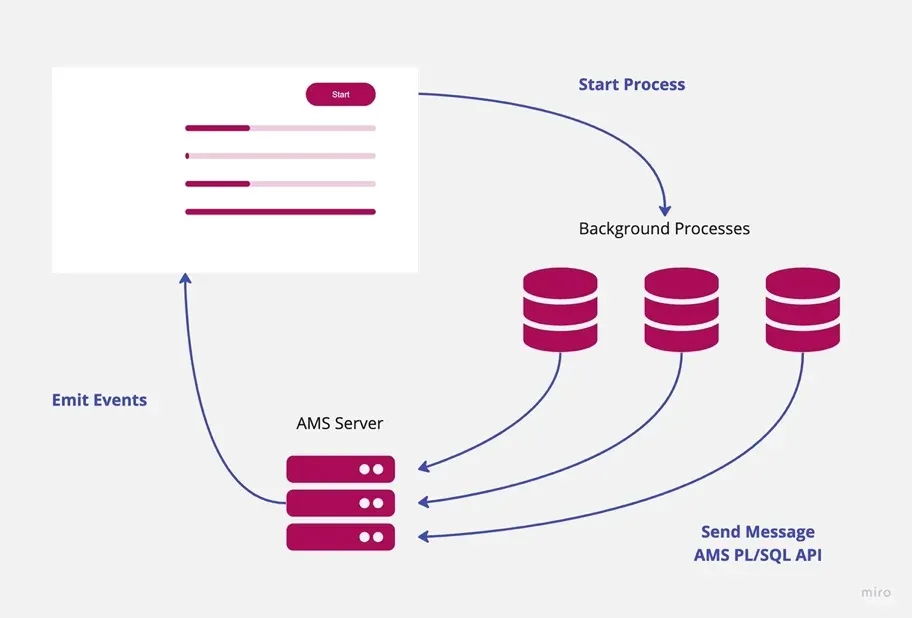
/In this example, the code doesn’t really do anything. But for the duration of the process, a message is being sent to the AMS server through the PL/SQL API every 5 seconds. The message, in JSON format, contains the job_id, percentage completed, and status. Although this is a basic example, the message can contain much more information, such as status updates or debug messages. Don’t forget to adjust the URL, API key, and the room name(s). You can find this information by logging in to the AMS Portal.
APEX
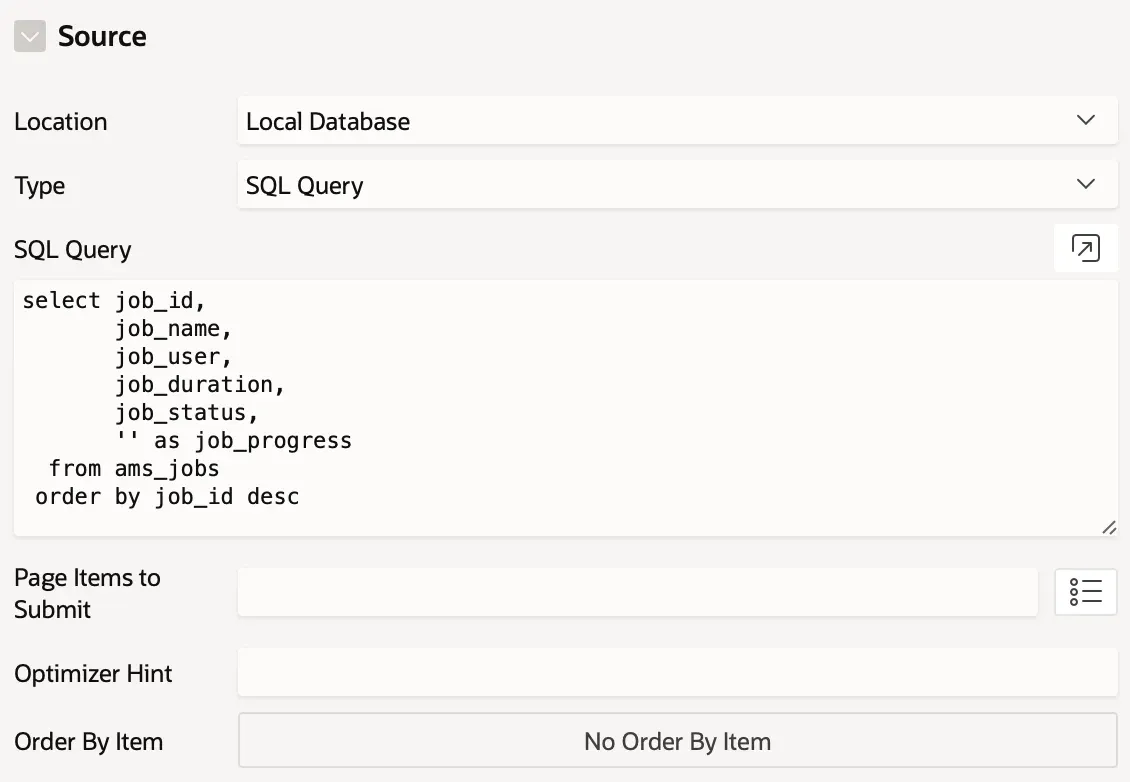
Start with a new application or page and create a Classic Report based on a SQL Query. We’ll use our table that was created earlier. Make sure to set the Static ID of the region to job_overview.
select job_id,
       job_name,
       job_user,
       job_duration,
       job_status,
       '' as job_progress
  from ams_jobs
 order by job_id desc
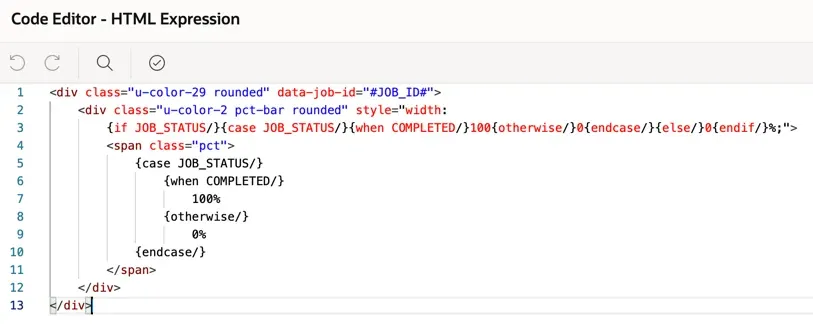
The last column will be the placeholder for the progress bar, so you need to add this code to the column’s HTML Expression:
<div class="u-color-29 rounded" data-job-id="#JOB_ID#">
    <div class="u-color-2 pct-bar rounded" style="width:
        {if JOB_STATUS/}{case JOB_STATUS/}{when COMPLETED/}100{otherwise/}0{endcase/}{else/}0{endif/}%;">
        <span class="pct">
            {case JOB_STATUS/}
                {when COMPLETED/}
                    100%
                {otherwise/}
                    0%
            {endcase/}
        </span>
    </div>
</div>
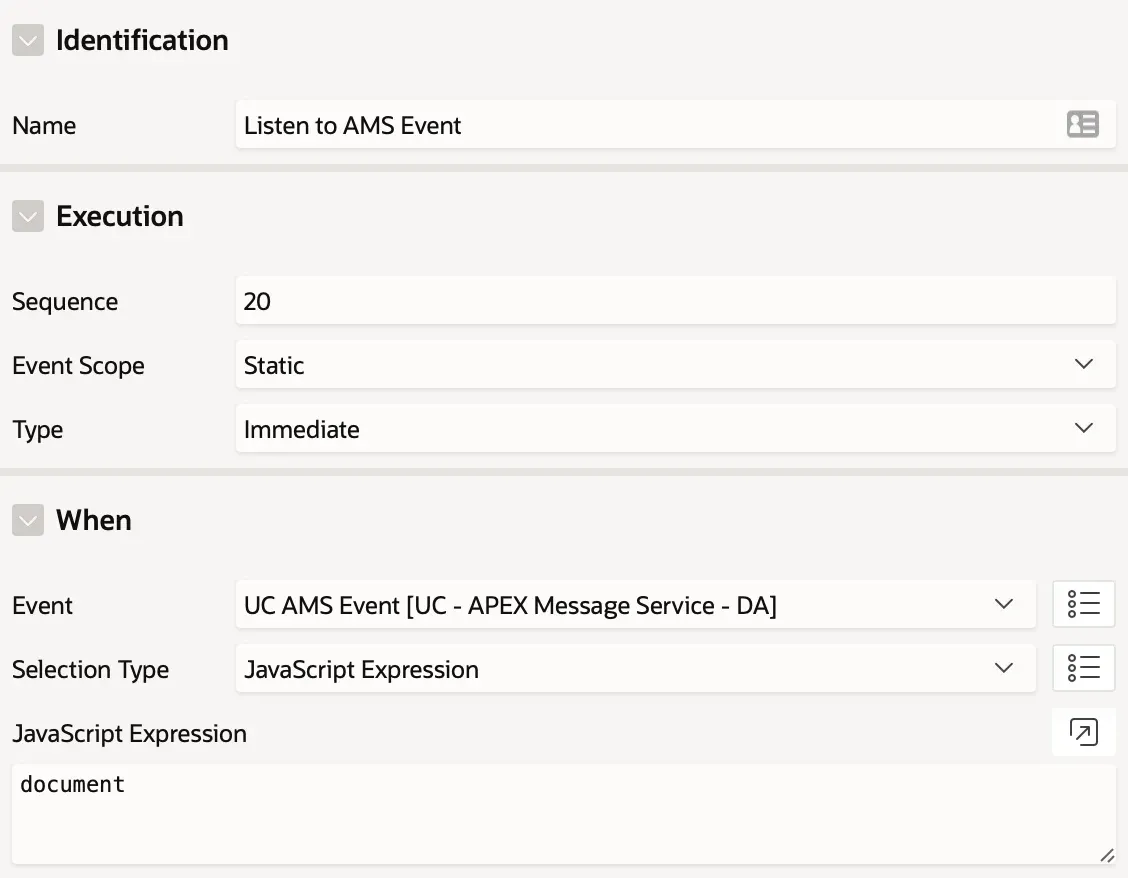
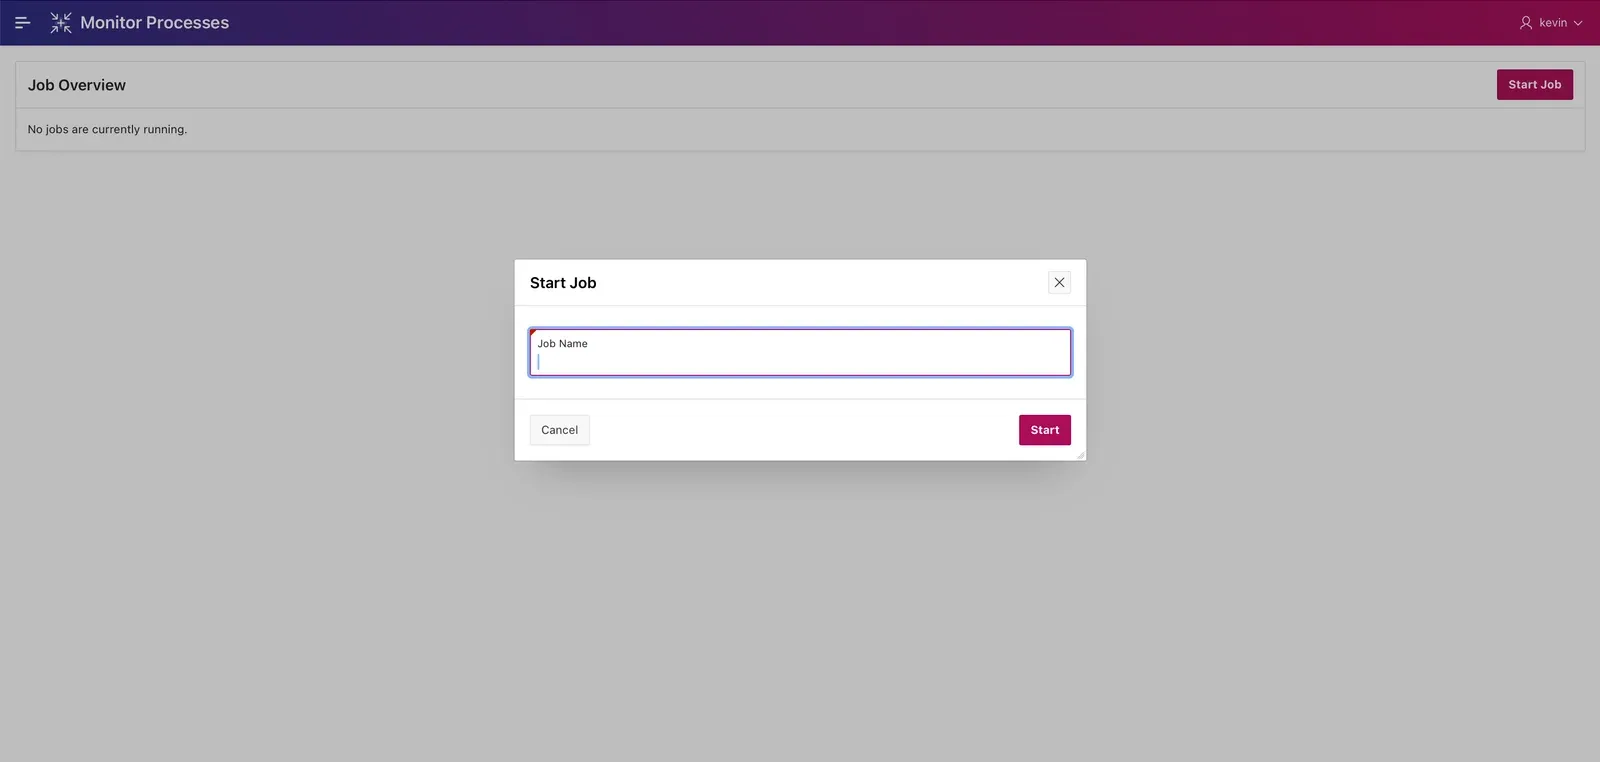
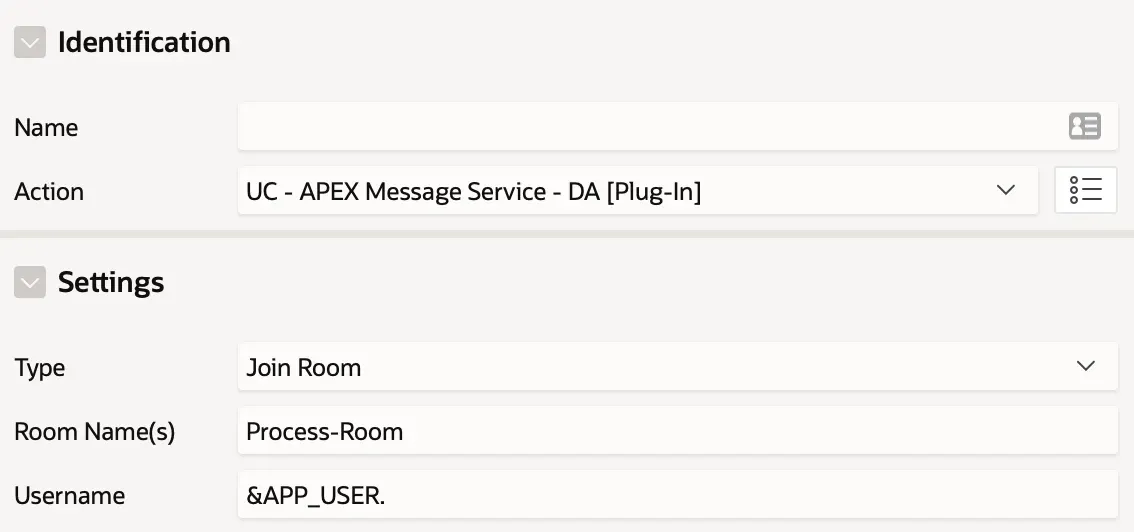
With 2 Next, add a button to the report (to open the dialog) and create an Inline Dialog with 1 Page Item for the job name. Mine is called P1_JOB_NAME. On the dialog, there’s a Cancel and a Start button. This is all just basic APEX. You should have something like this: To start a background process, create a Dynamic Action for the Start button and execute the following PL/SQL code: First, a unique job name is being generated. The job name and an internal number from the DBMS Scheduler are concatenated. The duration is set anywhere between 30 and 90 seconds. We insert a record into the AMS_JOBS table, and a job_id is created, which will be used as the first argument for the job. Note that the procedure start_job from the ams_jobs_pkg package is being executed. After the PL/SQL code, add 2 more actions to close the dialog and refresh the report. Now comes the fun part! Before AMS can be integrated into the page, we must install the package and the Dynamic Action plug-in. Please see the Quick Install Guide for more information. Don’t forget to fill in your AMS Server URL and API key in Shared Components -> Component Settings -> UC - APEX Message Service - DA [Plug-in]. To send and receive messages (the page will only receive messages in this case), we need to join a room first. Create a Dynamic Action (UC - APEX Message Service - DA [Plug-in]) on Page Load. Make sure to enter the same Room Name(s) as the one(s) provided in the AMS_JOBS_PKG package. My room is called Process-Room. Next, create another Dynamic Action for the UC AMS Event (UC AMS Event [UC - APEX Message Service - DA]. Set the Selection Type to JavaScript Expression and JavaScript Expression to document. Add an action to execute JavaScript Code and add the following code: This is the place where the report is being updated with data from our background processes in real-time! The percentage is coming from the AMS Server, and for each process, the width of the progress bar and the percentage will be updated accordingly! Note that the progress is not stored. Therefore, when the report is being refreshed, all active processes will have a zero percentage until the next update from the AMS Server. With a combination of the AMS PL/SQL API and plug-ins in APEX, we can achieve great things! This is just one of many use cases for APEX Message Service. Please see our Sample Application for more examples or visit the AMS website to get started!td[headers="JOB_PROGRESS"] {
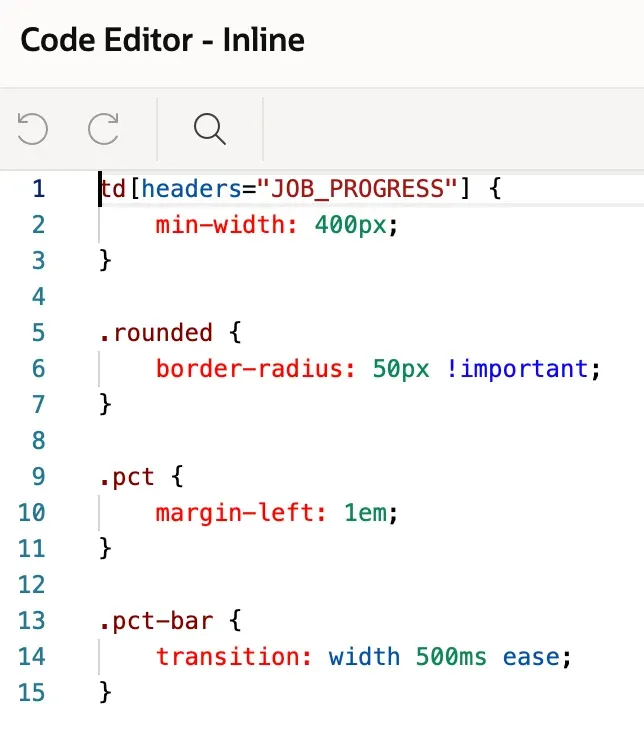
min-width: 400px;
}
.rounded {
border-radius: 50px !important;
}
.pct {
margin-left: 1em;
}
.pct-bar {
transition: width 500ms ease;
}
declare
    l_job_id       ams_jobs.job_id%type;
    l_job_name     ams_jobs.job_name%type;
    l_job_duration ams_jobs.job_duration%type;
begin
    l_job_name := dbms_scheduler.generate_job_name(prefix => :P1_JOB_NAME || '_');
    l_job_duration := round(dbms_random.value(30, 90) / 5) * 5;

    insert into ams_jobs (job_name,
                          job_user,
                          job_duration)
    values (l_job_name,
            :APP_USER,
            l_job_duration)
    returning job_id into l_job_id;

    commit;

    dbms_scheduler.create_job(job_name            => l_job_name,
                              job_type            => 'stored_procedure',
                              job_action          => 'ams_jobs_pkg.start_job',
                               number_of_arguments => 2,
                              enabled             => false);

    dbms_scheduler.set_job_argument_value(job_name          => l_job_name,
                                           argument_position => 1,
                                           argument_value    => l_job_id);

    dbms_scheduler.set_job_argument_value(job_name          => l_job_name,
                                           argument_position => 2,
                                           argument_value    => l_job_duration);

    dbms_scheduler.enable(name => l_job_name);
end;Integrating AMS
$('#job_overview [data-job-id=' + this.data.amsdata.job_id + ']').closest('tr').find('td[headers="JOB_STATUS"]').text(this.data.amsdata.status);
$('#job_overview [data-job-id=' + this.data.amsdata.job_id + '] .pct-bar').css('width', this.data.amsdata.pct + '%');
$('#job_overview [data-job-id=' + this.data.amsdata.job_id + '] .pct').text(this.data.amsdata.pct + '%');