Usage
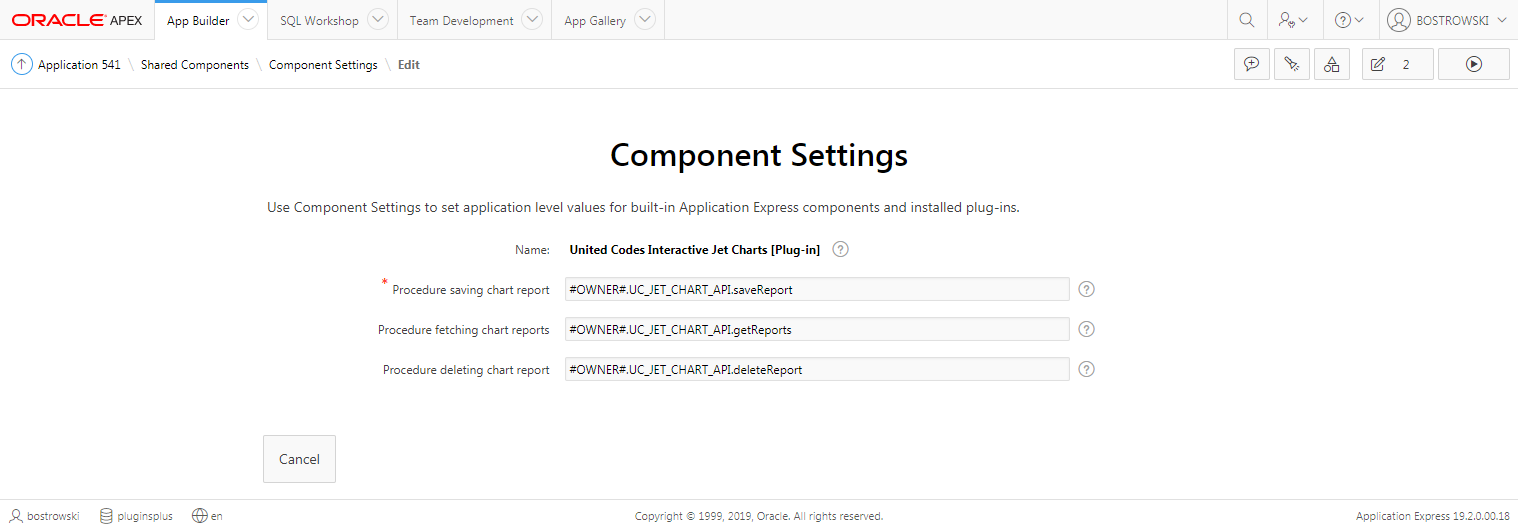
This section describes implementing the Interactive JET Charts Pro in the sample application for a combination chart. The plug-in uses the UC_JET_CHART_API package to save, delete, and fetch the plug-in chart reports. The plug-in application attributes are defined as an image below.
In your application, you have to create a new table that will store the plug-in chart settings and a package (or standalone procedures) for the plug-in actions: save, fetch, and delete reports.
- see the sample application table UC_JET_CHANGES and package UC_JET_CHART_API for an example implementation.
- keep in mind that the sample application uses the APEX session to identify the current user. In your implementation use the procedure's parameter with the current user.
- if you plan to migrate saved reports between different environments use APEX region Static ID (and optionally APP_PAGE_ID in procedures) to uniquely identify a chart
Introduction
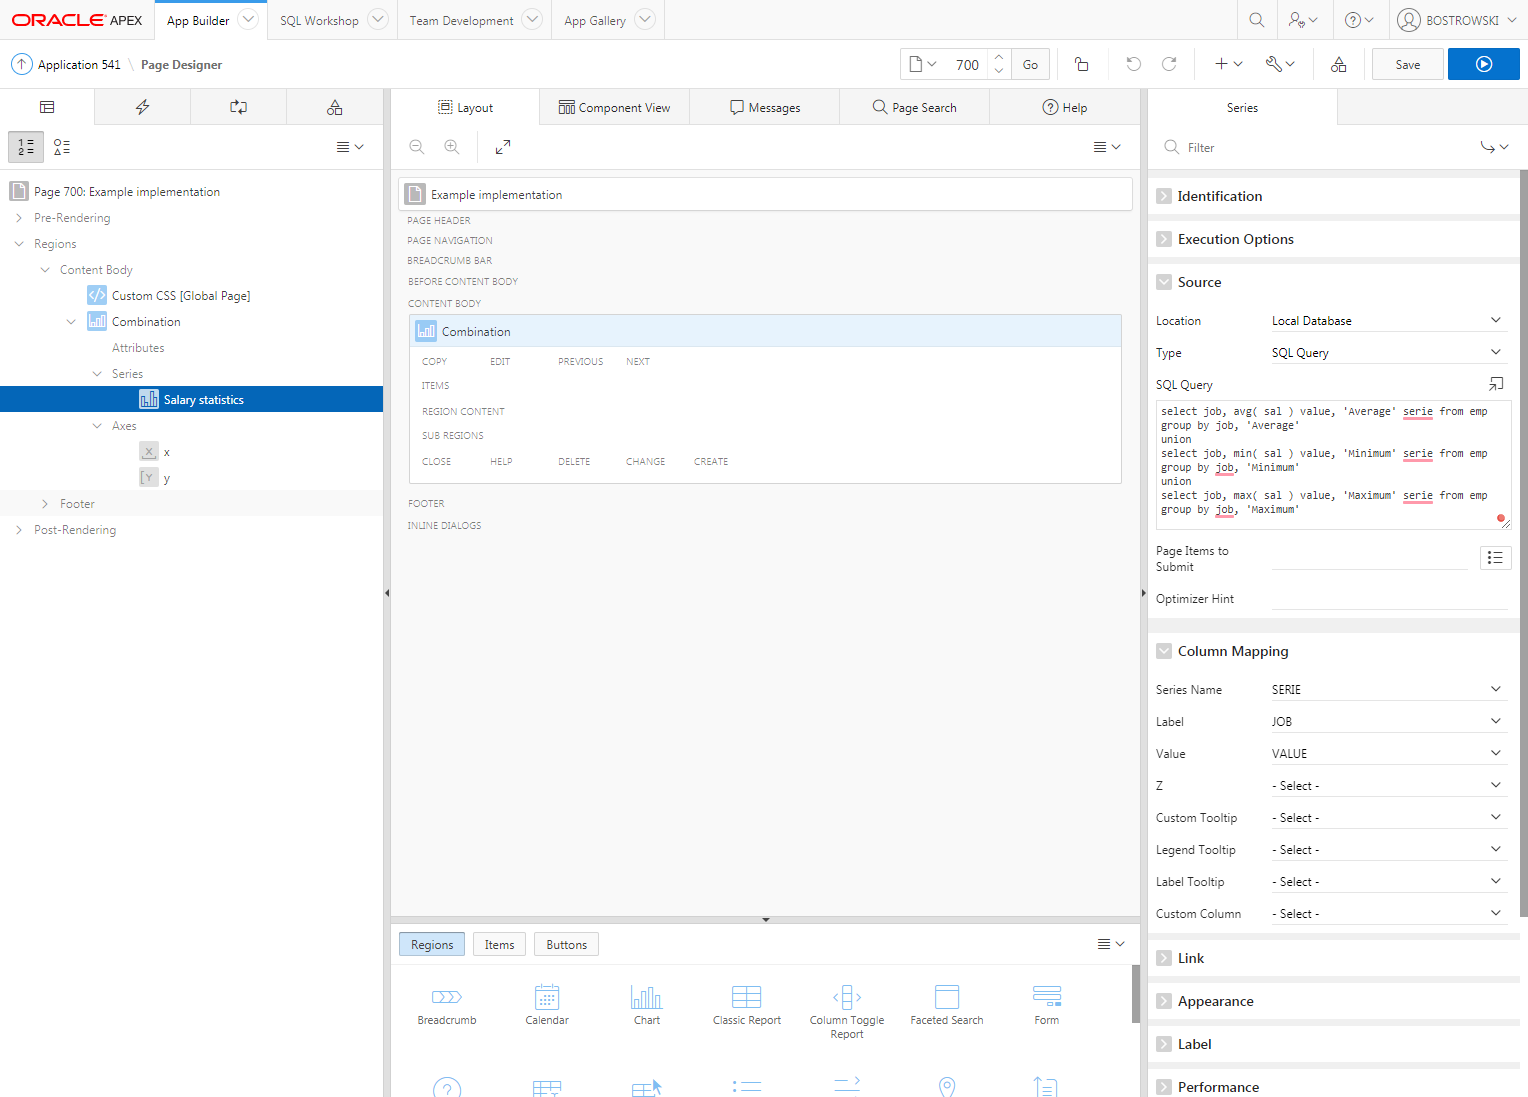
In an example application, page 700 is defined. On the page, a combination chart is created. The region has the Static ID attribute set to combo, the region type is set to Chart, and chart type is set to Combination. The region source is set to SQL Query presented below.
select job, avg( sal ) value, 'Average' series from emp group by job, 'Average'
union
select job, min( sal ) value, 'Minimum' series from emp group by job, 'Minimum'
union
select job, max( sal ) value, 'Maximum' series from emp group by job, 'Maximum'
The chart settings are set to default and chart Series Column Mapping is defined as on an image below.
Implementing the plug-in
To successfully implement the plug-in a new button and dynamic action must be created.
Create the plug-in button
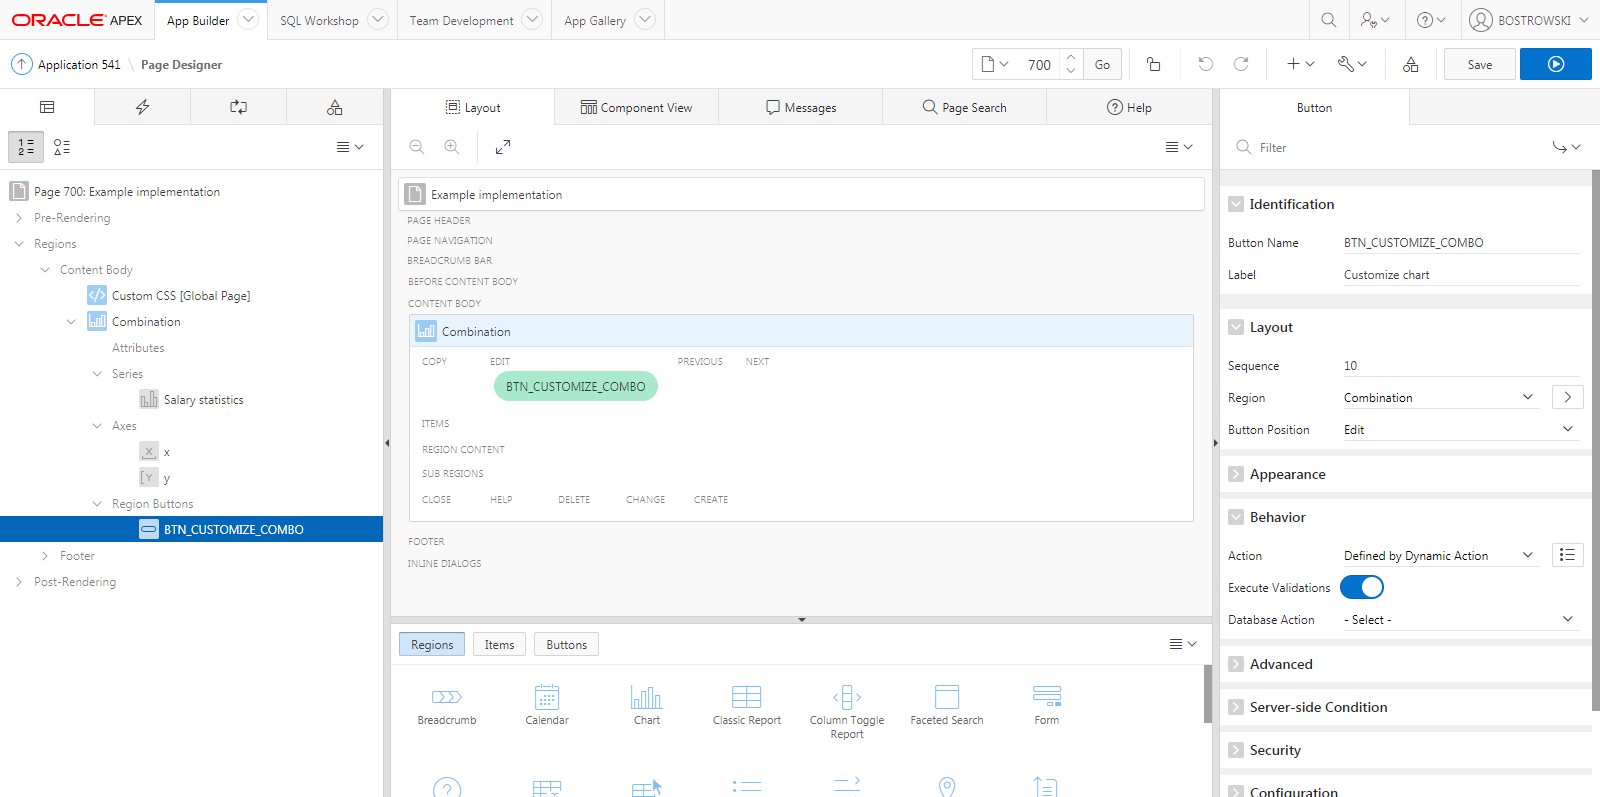
- Right-click on Combination region and select Create Button
- Set Identification \ Button Name to BTN_CUSTOMIZE_COMBO
- Set Identification \ Label Name to Customize chart
- Set Layout \ Button Position to Edit
- Set Behavior \ Action to Defined by Dynamic Action
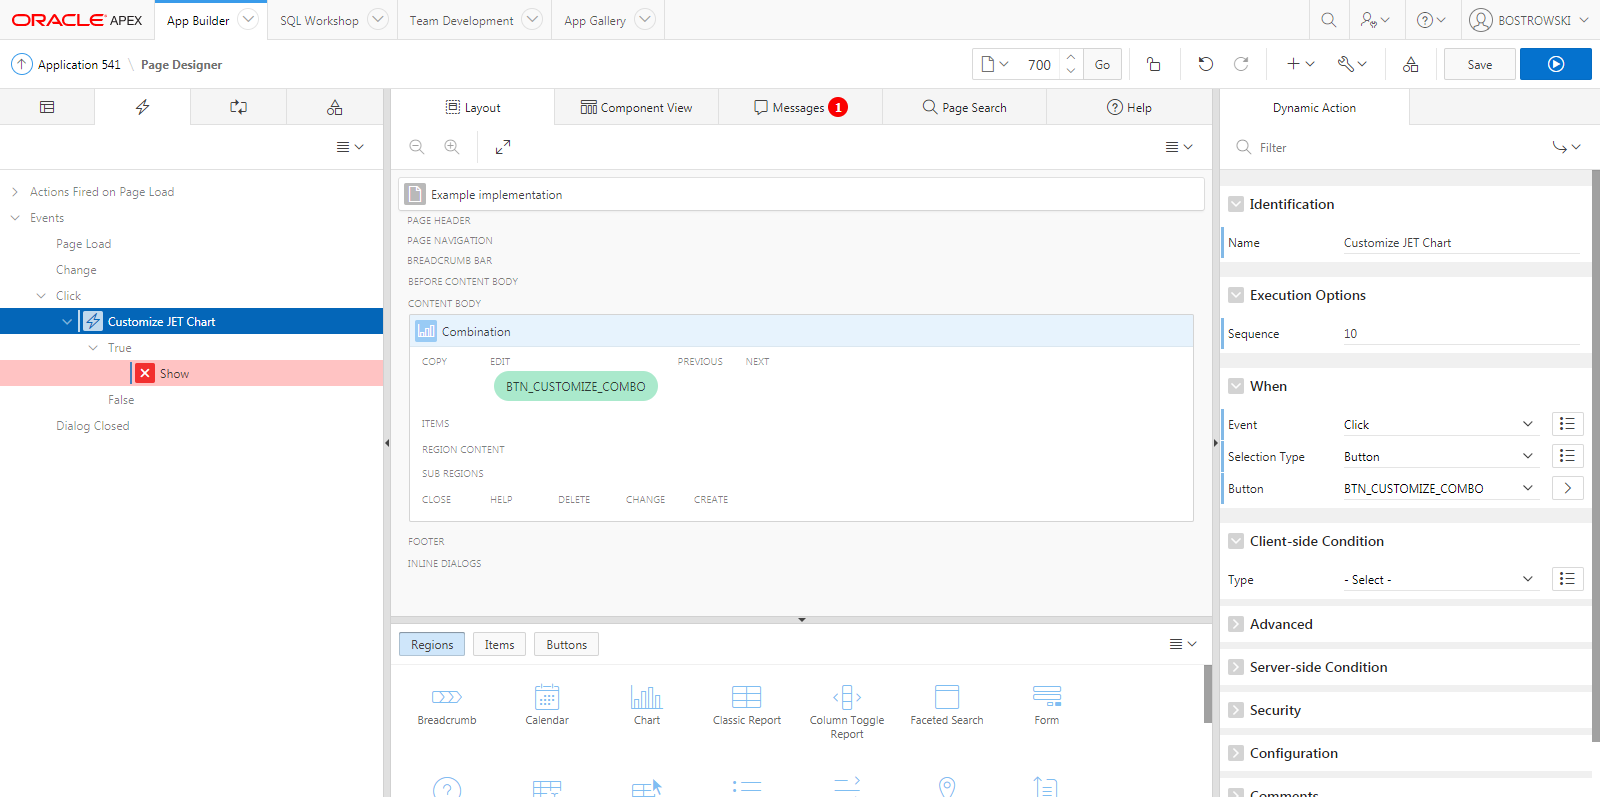
Dynamic Action
- Create a new dynamic action
- Change the dynamic action’s name to Customize JET Chart
- Set When \ Event to Click
- Set When \ Selection Type to Button
- Set When \ Button to BTN_CUSTOMIZE_COMBO
The dynamic action definition in the page designer is presented below:
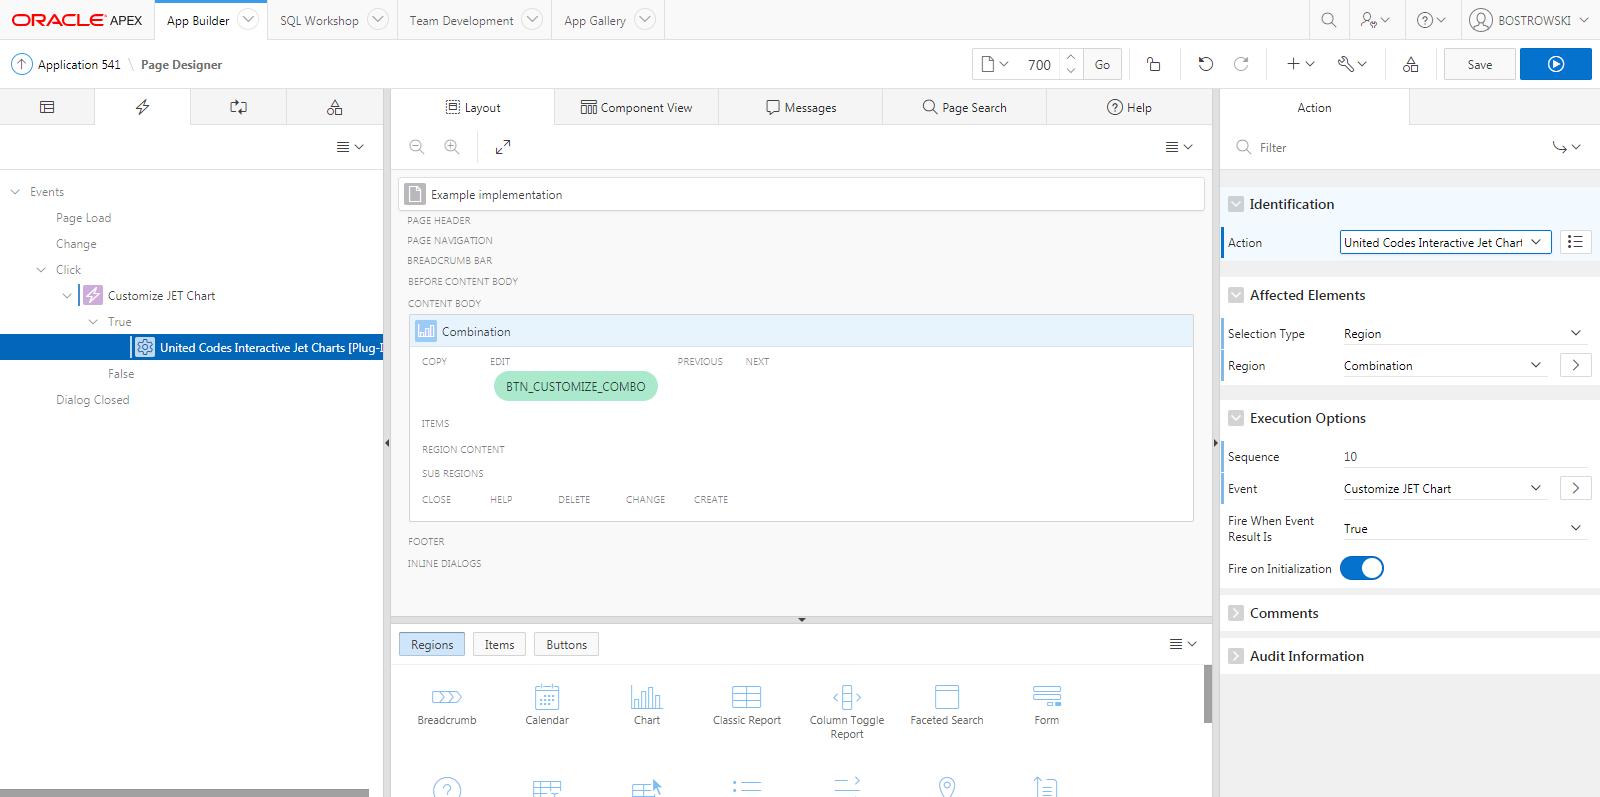
Dynamic Action - True Action
The default true action of the newly defined dynamic action is Show.
- Select the default true action Show
- Change Identification \ Action to United Codes Interactive JET Charts [Plug-in]
- Set Affected Elements \ Selection Type to Region
- Set Affected Elements \ Region to Combination
- Set Execution Options \ Fire on Initialization to Yes
- Save the page
The plug-in dynamic true action is presented below:
Test the Implementation
- Open page 700 in browser
- Click button BTN_CUSTOMIZE_COMBO
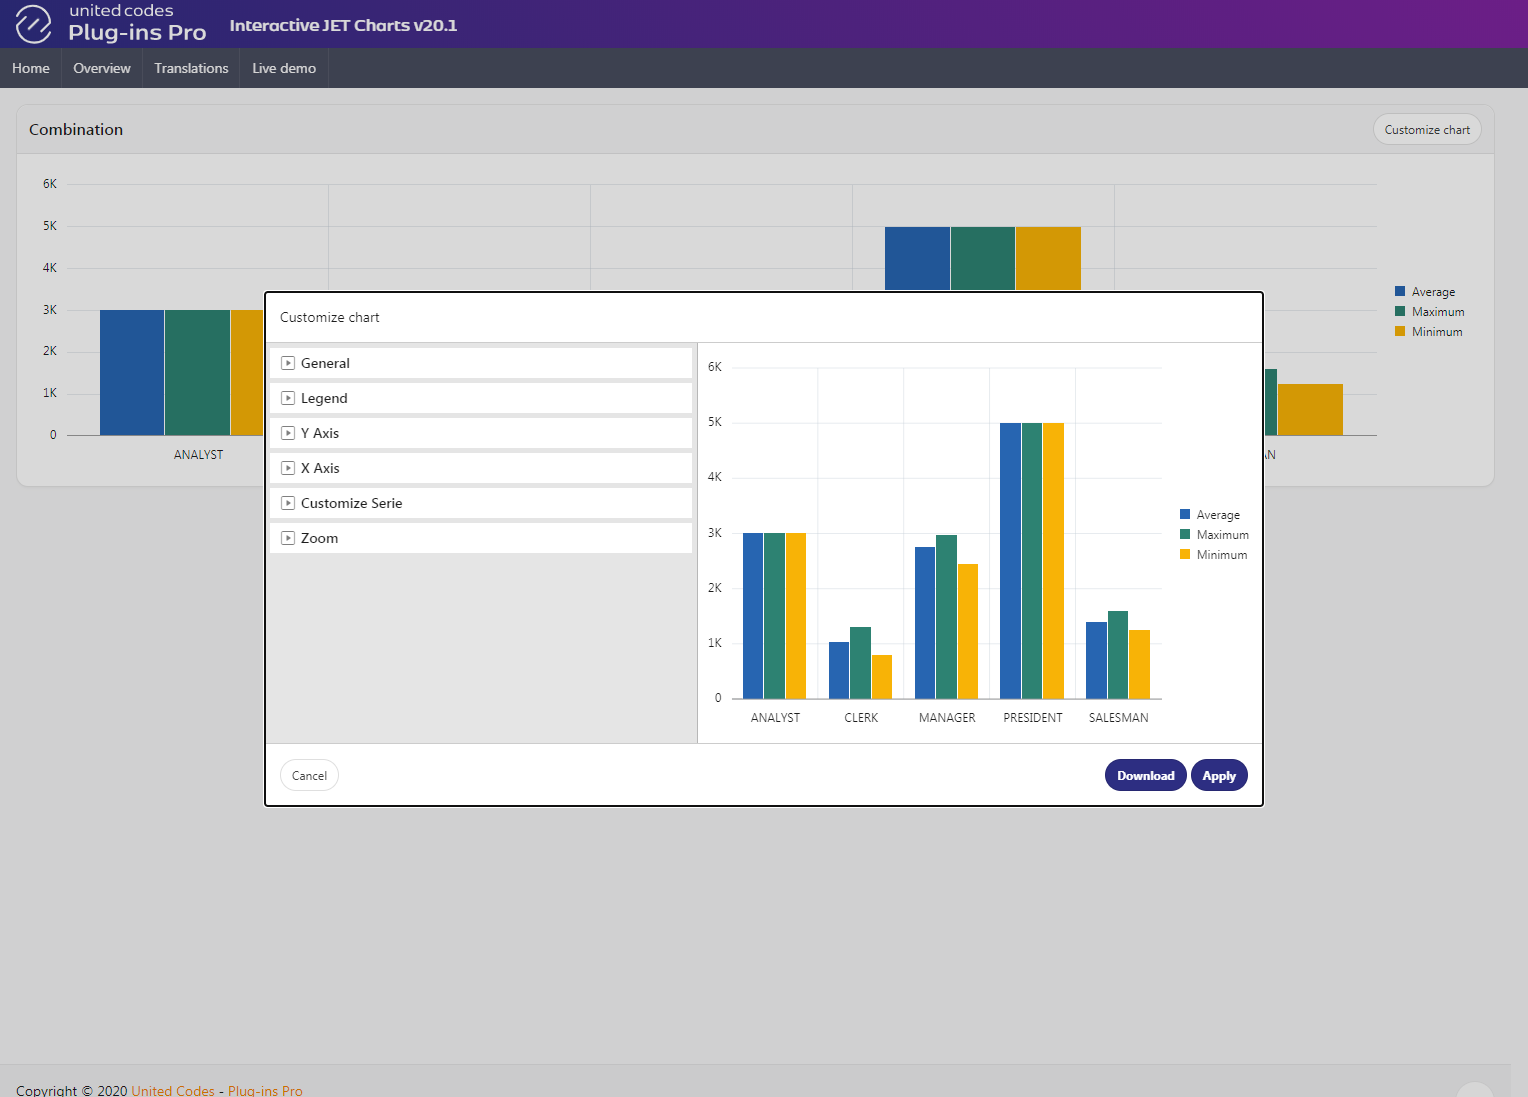
The plug-in is ready to use. The result of clicking the triggering button invokes the plug-in menu.
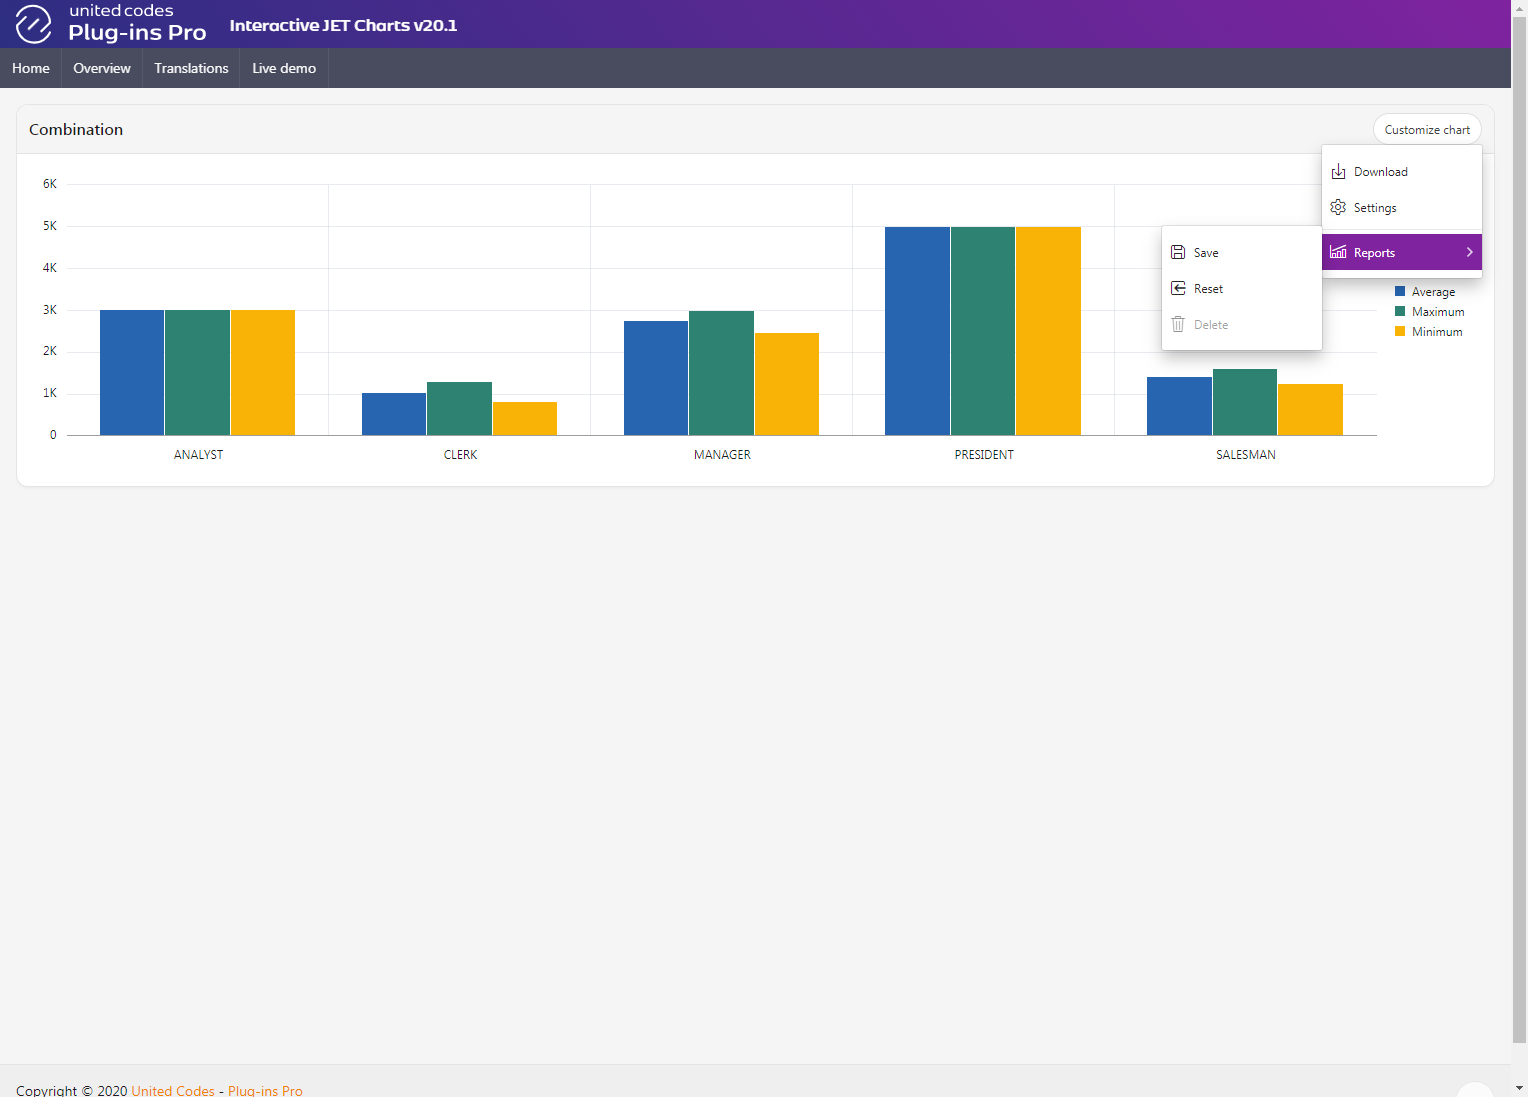
Selecting Settings from the plug-in menu opens the customization interface: